Thursday, April 29, 2010

French Bread Recipe "Easy"

A few weeks back I posted a yummy corn chowder recipe!  Very tasty and easy!  I also had made a loaf of french bread which I said I would post the recipe here.  Very easy!  Very Yummy!  I love the smell of bread baking.  Love warm bread with butter spread all over.  Oh my!

So you will need the following to make this bread.  Active Dry Yeast (not rapid rise), sugar, salt, flour, olive oil, and hot water (at least 110 not over 125 degrees).

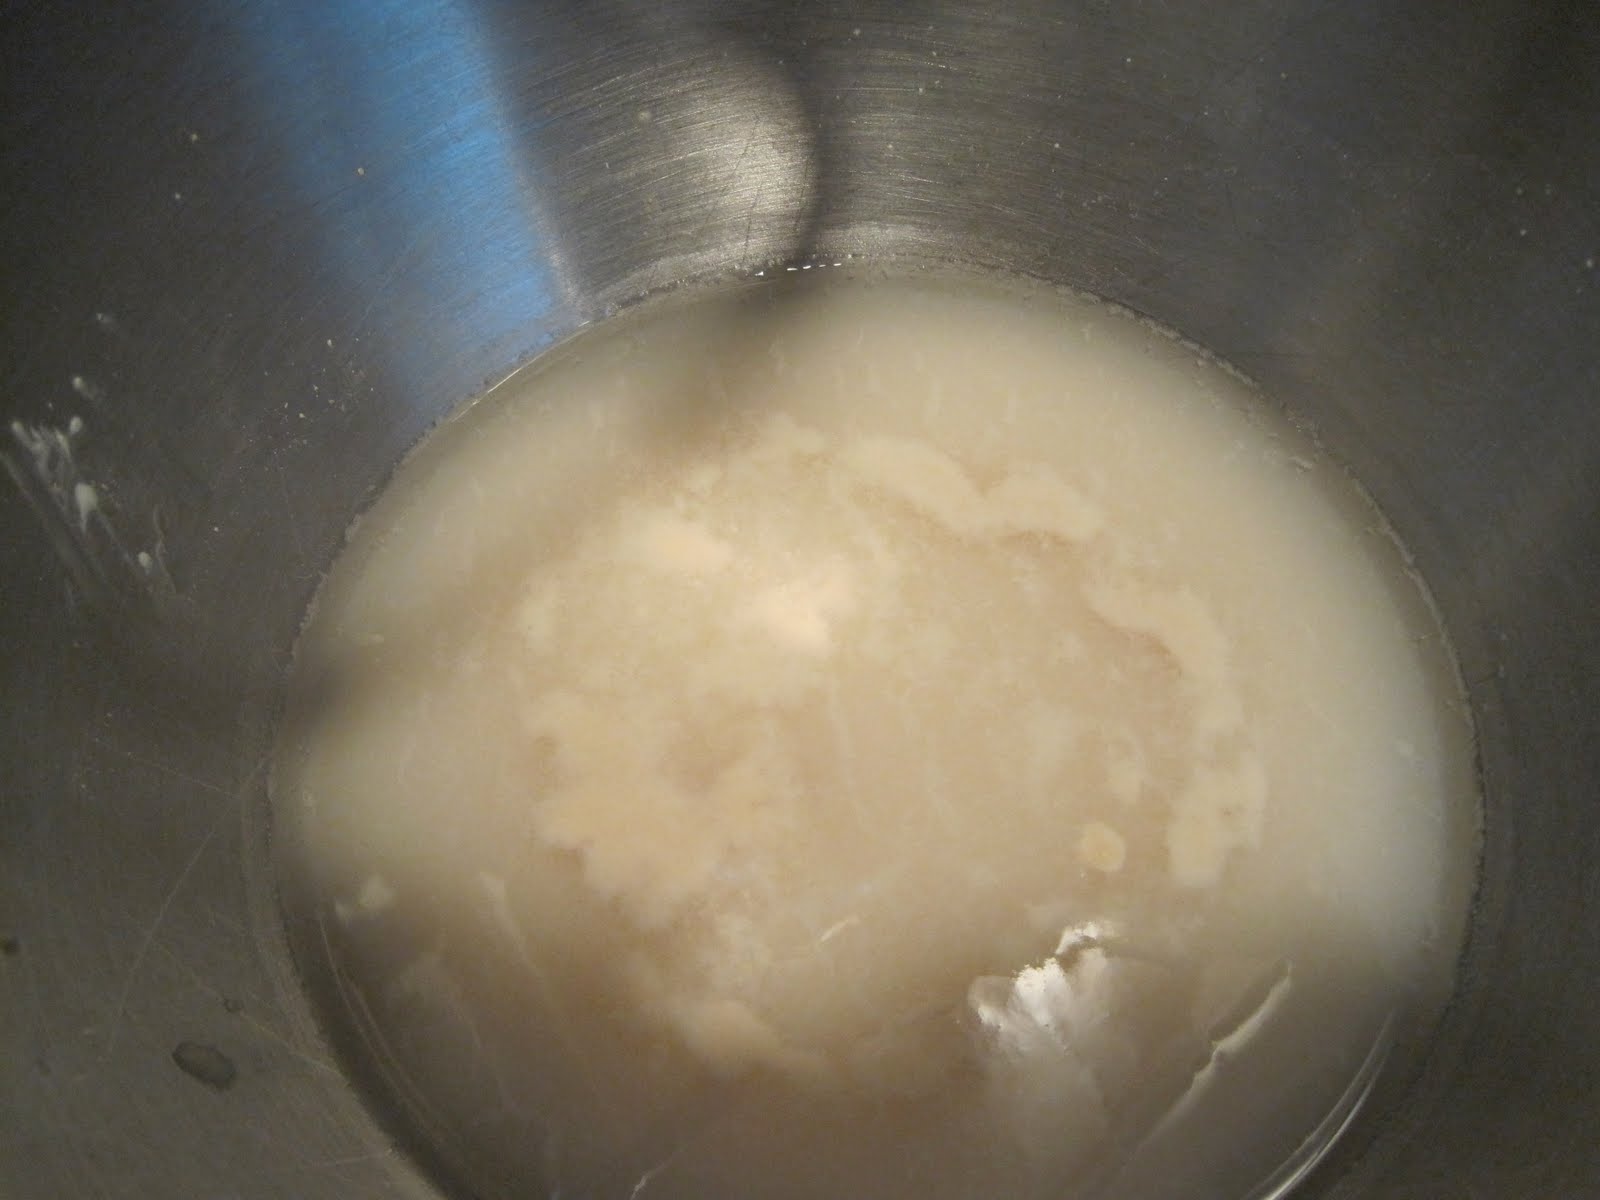
Put your yeast into your mixer bowl along with one teaspoon of sugar.  Add hot water and proof until yeast is bubbly (about 5 minutes).  Add two and a half cups of flour, one teaspoon of salt into the yeast mixture.  With bread dough hook attached to mixer, mix the yeast and flour mixture until it starts to pull away from the mixing bowl.

Then take the dough out of the mixing bowl and dust your surface with a little bit of flour and knead until dough is no longer sticky (add flour as you go).


Place dough in a well oiled bowl and rub oil on top of dough and cover with plastic wrap.  Set in a warm place to rise (if your room is really warm it will take about 30 minutes) for approximately 45 minutes.

Punch dough down and spread out into an oblong shape - roll dough up gently and place in a french loaf pan or a cookie sheet cover with plastic wrap and let rise again for approximately 30 minutes.

Once bread has risen the second time remove plastic wrap and place bread in a pre-heated 450 degree oven for approximately 20 minutes until golden brown.  Remove from oven and let cool slightly before slicing and buttering.  Enjoy! (I put melted butter on top of this loaf after it cooled slightly)


French Bread Recipe
1 packet of active dry yeast
1 teaspoon sugar
1 teaspoon salt
1 cup hot water (110 - 125 degrees)
3 cups all purpose flour (I use unbleached flour)
1 tablespoon olive oil

Preheat oven to 450 degrees
Mix yeast, sugar with hot water until yeast becomes bubbly (proofing the yeast).  Add two and a half cups of flour and mix until dough pulls away from the bowl.  Place on lightly floured surface and knead dough until smooth and no longer sticky (use the remaining flour as needed).  Place dough in bowl with olive oil and rub top of dough with oil and cover with plastic wrap.  Let rise for approximately 45 minutes.  Punch dough down and gently spread out into oblong shape, roll up into jelly roll shape and put in french loaf pan or cookie sheet.  Cover with plastic wrap and let rise again for approximately 30 minutes.  Remove plastic wrap and bake in preheated oven for approximately 20 minutes until golden brown.  Enjoy!

Tip:  For those who do not have a stand mixer you can still do this recipe.  Follow the directions using a hand mixer but only add a half cup of flour at a time (do not add all the flour at once).  Depending on your hand mixer after adding one to two cups you will need to turn the dough out onto the counter and knead in the rest of the flour until it becomes smooth.  This process will take longer because you are actually adding the flour by kneading it into the dough.  Follow the rest of the recipe normally.


Wednesday, April 28, 2010

Spring Weather

Well I don't know about everyone else, but our weather has been just wacky!  One weekend will be nice and the next we have snow and hail.  I just wasn't sure if planting flowers and my garden were going to be in the works this year.  I actually started on a project that I had found in my home file and my DH was willing to help out!

These are corner planters that my DH built from my file plans and I decided to get some spring color on the deck and painted them tangerine!   Is that the brightest orange you've ever seen.  I saw the color and thought why not!  I was thinking with some pretty flowers it would look great.  Then I thought flowers - um!


So I painted yellow flowers on the boxes to go with the orange - bright and spring like  don't ya think?  It's been weeks since these were completed and finally today I decided to plant flowers.  My only problem now is they are calling for snow all the way down to 4000 ft I'm hoping it doesn't get any lower or I'll lose what I planted today. :(   I just couldn't wait any longer and bought these flowers yesterday.  I am so ready for nice spring weather.

Monday, April 26, 2010

The Play Date Cafe Challenge PDCC #26

It's that time PDCC!  This week the sponsor is Mod Podge Rocks and the awesome host is Amy Anderson!  She is very generous and is offering up a Mod Podge Rocks "Starter Pack" for "Cup of the Week".  As Julie Ranae said this is not your mama's Mod Podge check it out at Amy's blog click the Mod Podge Rocks link above.

This week's celebrity guest designer is Jen Tapler of Jen Tapler Designs.  Jen said, "I'm really into hybrid papercrating (digi meets traditional).  Let me tell you with all her lists of other accomplishments and her addiction to all things paper - she has to be one busy gal!

So this week's Cafe Challenge is from Julie Ranae - inspired by the Sundance catalog.  Yummy eye-candy for sure!

This is PDCC's celebrity guest Jen Tapler's design!  Wonderful eye-candy as well!  Along with all the other design teams creations - well! I just had to play! 

Check out all the gorgeous creations over at PDCC.  Lot's of wonderful talent there to ogle over.

Here is my card for this challenge!  I'm always having fun playing with the Play Date Cafe Challenge. - so this card was just a bit different for me!  I used foil for the silver in my card!  Hope you like it?  The sentiment is a little light in this picture but it say's "thinking of you".

Wednesday, April 21, 2010

Moxie Fab Challenge!


Moxie Fab World issued a challenge in honor of the Go-to Sketches Week. This sketch was from Kim Kesti the Paper Crafts Go-to Gal. You can find this sketch in the Go-to Sketch issue and it is Sketch #28 and located on page 94.   Here is that wonderful sketch if you don't have your  issue yet.


My first time for using a bubble sentiment - how fun! Well if apples could only talk! I altered a little bus cut from cricut into a truck so it could haul some apples to market! Hope you like!


{Apple Truck supplies}
 Paper: PTI/ kraft, black, DWCV /bright
Other: Computer generated bubble with sentiment, silver, and green pens, cricut cuts


Saturday, April 17, 2010

The Play Date Cafe Challenge PDCC #25

Yes! Another great inspiration over at The Play Date Cafe so click on this link to check it out!  It's Color Splash Challenge again (my first time playing).  Every six weeks or so a color challenge is introduced and this time the color's are Black, White, and Orange.  I've posted the inspiration photo below!  Eye catching don't ya think?  Also a little gift is offered on this Challenge and is from the "celebrity" Guest Designer Kelly Marie Alvarez of Lawn Fawn Designs.

Kelly says she loves designing fun and bright creations that make people smile.  I think she's doing a wonderful job, she sure made me smile with this giveaway gift for this week's color challenge.


Isn't this so cute! :)

So this is my creation for this challenge - I know most people think of black and orange and Halloween comes to mind. Confession - I'm one of those people and I thought twice about playing this week because I am horrible at anything Halloween! But I started thinking a little more about the colors and this is what I came up with.   A bit more than a splash of orange.  Hope you enjoy!  
P.S.  Let's hope Julie is feeling better soon!


{Thanking of you supplies}


Paper: DCWV Brights & Glitter, Staples basic white cardstock
Stamps: PTI / Vintage Picnic Sentiments
Ink: PTI True Black
Other: Stick Pin tied w/ orange tulle, Black sparkle cord tied into a tassel, Pearl dots


Friday, April 16, 2010

Magic Carpet

I fly!  No not by flapping my arms up and down (insert giggle).  If you notice in my profile I say I'm interested in all things from A - airplane to Z - zinc.   (Short version) My husband had a bright idea one day that he wanted to build an airplane.  Well he did lots of research and decided we would build an RV9A, which is a kit plane.  Basically you order the plane parts and build this plane in sections.  We actually started in 2003 when we first received the tool kit for building the plane and it went from there.  Several years and many long weekends later we had our plane built. 

This is the plane we built.  So you'll notice the smudge look near the tail of the plane.  I just used the edit software to remove our "N" number.  So no - that is not part of the paint job.  My DH actually designed the paint job for the airplane.  Nice!  So why is this post titled Magic Carpet - because this is what we call our airplane on occasion.  We have been able to fly to some interesting places since building this thing.  We have actually flown from California to North Carolina for Christmas one year.  Yep - that's right!  So my Birthday is next week and my DH decided to surprise me and planned a trip to San Diego. 
We have flown to San Diego several times but it is a bit iffy sometimes in April with the weather and everything. Hopefully by Monday we will have a better look at what the weather will be like for the week. We are going to be staying here at The Dana - if you ever get a chance to stay here ask for the rooms on the marina side. It's such a nice view and very peaceful and quiet. The waterfront view is okay too I just prefer the marina side. You can actually walk to Sea World from this place. It's an amazing place to stay. I'm going to keep my fingers crossed and hope we get to take off.

Wednesday, April 14, 2010

Jalapeno Corn Chowder

I have such an easy peasy recipe here!  If you don't care for Jalapeno you could leave it out but it really doesn't make it hot it just gives it some flavor.  This is also a quick recipe! (always good)
Here is a list of ingredients:  Butter, onion, red bell pepper, jalapeno pepper, cumin, flour, chicken broth, evaporated fat-free milk, frozen yellow corn, chopped fresh cilantro.  Oh did I tell you this is surprisingly creamy but not a stitch of heavy cream!

Melt the butter in a medium saucepan over medium heat.  Add the chopped onion, bell pepper, jalapeno and cumin.  Cook stirring for 10 minutes or until the onion and peppers are tender.

Chopped veggies


Add flour and stir for 1 minute.  Stir in broth and evaporated milk.  Increase heat to high and bring to a boil while stirring.  Add the corn and cook for 2 minutes.  Top with chopped cilantro and if you have any left over bacon from breakfast well you can use that as well.

Add flour

Add broth
Add milk

Here's a picture of the finished recipe!  I also baked a loaf of french bread (I have the easiest recipe for that I'll share in a later post) we had a glass of white wine from a local winery.  This really was quick less than 20 minutes from start to table.  Above all else it was Yummy! 


Jalapeno Corn Chowder
2 tsp butter
1 cup diced yellow onion
1 cup diced red bell pepper
1 jalapeno pepper seeded and finely chopped
1 tsp ground cumin (more if you like cumin)
3 Tbsp all purpose flour
1 1/2 cups chicken broth
1 cup evaporated fat-free milk
1 lb. frozen whole yellow corn, thawed  ( I have used canned corn in a pinch)
2 tbsp chopped fresh cilantro

Melt butter in a medium saucepan over medium heat.  Add the onion, bell pepper, jalapeno, and cumin.  Cook, stirring, for 10 minutes or until onion and peppers are tender.
Add the flour and stir for 1 minute.  Stir in broth and evaporated milk.  Increase the heat to high and bring to a boil while stirring.  Add the corn and cook for 2 minutes.  Top with cilantro.
Serves 4 / serving size 1 1/4 cups  220 calories, 25 calories from fat, 41 g total carbs.

TIP:  Place the frozen corn in a bowl in the frig in the morning and it will be thawed by dinnertime.


Monday, April 12, 2010

Moxie Fab Challenge!

Wow - talking about cutting it close!  I decided to enter "Picking Up the Pieces" challenge over at the Moxie Fab World.  I already had contemplated entering so I had an idea somewhat in my brain already.  Of course, seeing everything that Cath showcases makes your head twirl.  Such lovely pieces click on the link above to view all of the beautiful pieces.  I have added a few pieces to look at below - fun stuff don't ya think?


So I had an idea it was just going to take me a little bit of time to get it completed.  So with the flower picture above several flowers where punched out and then pieced back together to make a complete patchwork flower.  My card was created with this same sort of technique even though my flowers are a bit smaller and they were a challenge creating. (LOL - my fingers are stiff from all that tiny cutting).


I created tons of flowers in two different sizes and cut the petals off of each flower and then started piecing them back together randomly.  The water fountain was an idea I thought of after seeing a plate in one of my cricut cartridges (altered of course).  I stamped the flower stems, little bird and the water from the fountain.  I colored the bird in blue using my markers.   I added stickles to the center of each flower to make them sparkle.  Lastly stamped the sentiment from PTI and added a blue bow.


Thursday, April 8, 2010

The Play Date Cafe Challenge PDCC #24

Another round with The Play Date Cafe.  I am so enjoying the challenge each week not only is it wonderful eye candy but the colors have been wonderful!  This week's colors are yummy and I was just playing around with this same color scheme yesterday.  This week's Creativity Challenge was brought to us by Mona Pendleton from the design team.

As I was saying I was playing around with these colors yesterday and actually had something kind of put together already except I had been using white instead of cream.  So I changed out a few things and came up with this card this morning.  I like it - a bit different for me since I normally use my cricut in some fashion.  Of course, isn't that why we do these challenges to inspire us to use a new and different technique.   Thank you for all you do to inspire either thru the weekly challenge or your kind comments. Thank you Design Team!


I used DCWV/ Brights and PP I found in my scraps.  I embossed both papers added a stamped sentiment from PTI in plum pudding.  Cut a piece of  purple toile wrapped a lavender ribbon around it and hung an earring charm with a piece of purple floss.  It's really hard to see but the light lavender paper  as a floral background on it that matches to the embossing I did on the dark purple.  

Wednesday, April 7, 2010

Moxie Fab World presents Tuesday Trigger

This week's Tuesday Trigger from the Moxie Fab World was brought to us by Teri Anderson.  This is a lovely card - I had already discovered it in my copy of Go to Sketches when it shows up as the Tuesday Trigger - great timing!

I kind of went along with the looks of this because I really thought it was a great card.  I changed the bow to a smaller one and weaved it thru some embossed flowers after punching out the center of the flowers (I have some other ideas along that line I hope to use soon).  I also went a bit bolder with my color, take a look at my card below!


I used DCWV/Glitter for the PP and staples white paper for the base used my sewing machine and zig zag around the edge of the PP.   I cut some flowers using my cricut and used a purple embossed strip and weaved my yellow ribbon thru it.  I stamped PTI's / Commuique sentiment in PTI/ Plum Pudding cut that out and used pop dots to attach it to the card.  Yellow ribbon is from my stash.


Monday, April 5, 2010

Mojo Monday 133

Here is Mojo Monday's sketch # 133.  Isn't it pretty!  Go check out what the fabulous Mojo girls came up with.  This week"s sketch comes from Janette Olen.


I thought the sketch really called out for a serious card.  No, I don't know why I thought that! (insert nervous laugh here).  This was my take on this sketch.  I just hope my mother doesn't peek at this - she might find this in the mail for her.


The Play Date Cafe Challenge PDCC #23

The Play Date Cafe posted their newest challenge last week and I knew looking at those colors I wanted to play.  The Play Date Cafe Creativity Challenge #23 with Sarah Anderson was a beautiful photo inspiration from Martha Stewart.


Well I took one look and my mind started racing - Christmas with snowflakes, anniversary card, no all that blue just called out for a baby card.  So with that decided I went to work creating.  I must confess I have not made a baby card before so this was a little outside my comfort zone.  It was really fun and I don't think I did all that bad for my first baby card.
I used DCWV /Neutral & Glitter paper.  I used my cricut to cut the "BABY" stamped each of the letters with a background stamp in PTI ink - Fresh Snow.  Glued the letters onto a layered square using light blue and white.  The bottom of the card was put together layering glitter paper, ribbon and stickles to make it glitter a little more.  The ribbon is part of my stash and the tag was cut with my cricut and stamped with PTI Communique Sentiments with PTI ink - Fresh Snow.


Thursday, April 1, 2010

Moxie Fab World presents Tuesday Trigger

Here from the Moxie Fab World this week's Tuesday Trigger. Isn't this lovely - all those bright colors. Made me think of Easter - but what wouldn't since Easter is this weekend! Made me want to dye some Easter eggs - what about you? I especially love the orange one!


This Tuesday Trigger was brought to us by Alicia Thelin. Thank you Alicia!

I found myself still in the Easter swing having mailed out my Easter cards and Bunny Boxes last week. So this Tuesday Trigger was way to cool. I had pretty much everything still out and ready so I just started playing around and this is what I came up with. Not quiet as sophisticated as the set above, but it will do. Don't ya think? Happy Easter!

                        
Paper is DCWV / Brights, White card stock from Staples and PTI -Kraft paper. I cut egg shapes with my cricut and stamped eggs with PTI ink Fresh Snow. I also used a white gel pen to freehand some of the designs. Sentiment tag cut from cricut and stamped with PTI vintage touch to give it a vintage look. I used the PTI Communique clear stamp set and PTI plum pudding ink to stamp the word "Happy". Added a yellow chick cut out which I used pop dots on and some straw already in stash. The "EASTER" was also cut with my cricut and sponge stamped with PTI inks Raspberry Fizz, Lemon Tart and Orange Zest.